Inserting a Background Image |  |
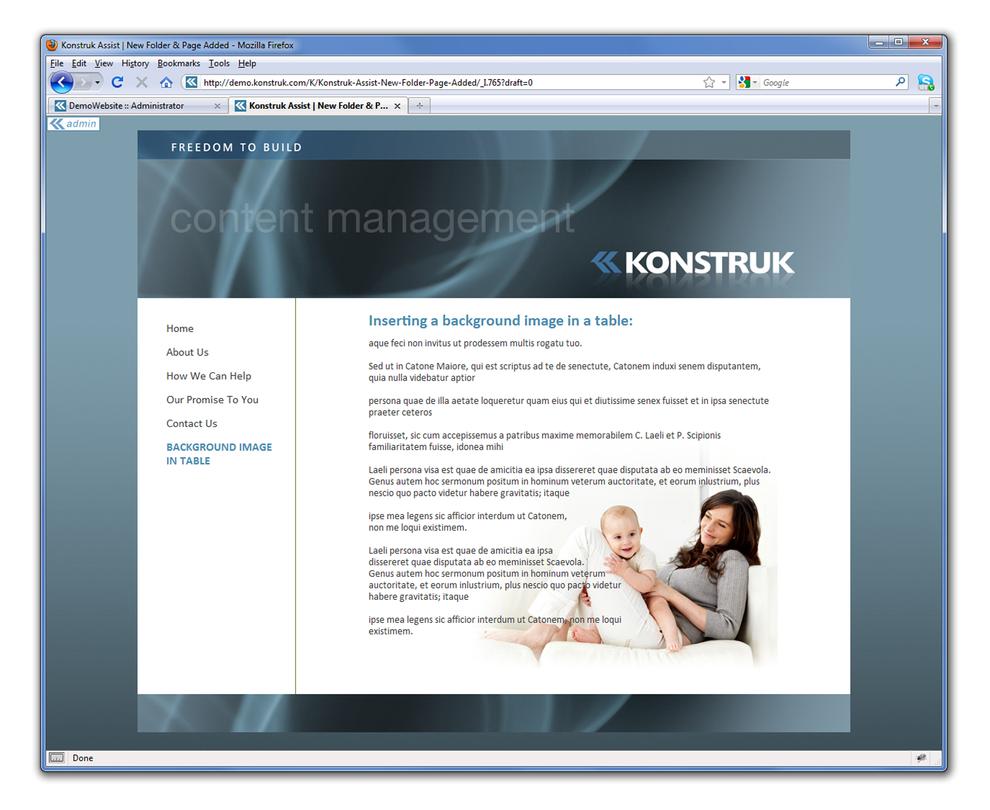
There are only certain times that you need to use a background image. The main reason is that you wish to have text overwrite the image. See the below image. To achieve this we will be combining some steps we have already learnt previously in this manual and adding some new ones.  This page has been made up of a base table with ‘0’ padding and ‘0’ margin at 70% width of the content block and centred on the page. The base table has the background image applied to it. Then there is a secondary table inserted into the base table at 100% of the base table, it has a padding of 200 pixels on the right allowing the words to ‘wrap’ around the image. - TIP/ you can also use hard enters at the end of a word to force ‘wrapping’ of text and only use a base table. This is more time consuming as you will need to flick between the draft view on your website and the administration editor to ensure that you place your enters correctly.
|
Firstly you need to upload and publish the image that you wish to have as a background image. 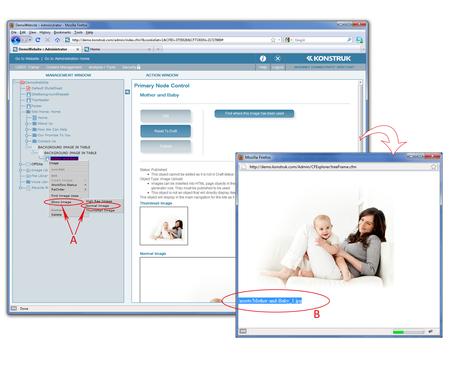
- Right click on the image node > Show Image > select the desired image you are wanting to use i.e. Normal.
- In the pop up box highlight and ‘copy’ the image name as it is on the server. e.g. assets/image name_T.jpg. The close the pop up window by clicking on the ‘x’ in the top right hand side as it will remain open.
- TIP/ if you remove the ‘copy’ from your computer clipboard, you can do these steps at any point, even when you are in the Page Content editor
Take a note of the size of your image that you are using as a background image as you will need to specify a width and height in pixels on the table data cell it will be placed withi |
As mentioned above for this example we have chosen to use two tables, the background image is going to be added to the table data cell of the base table.
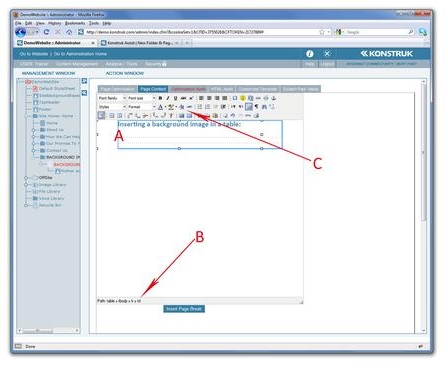
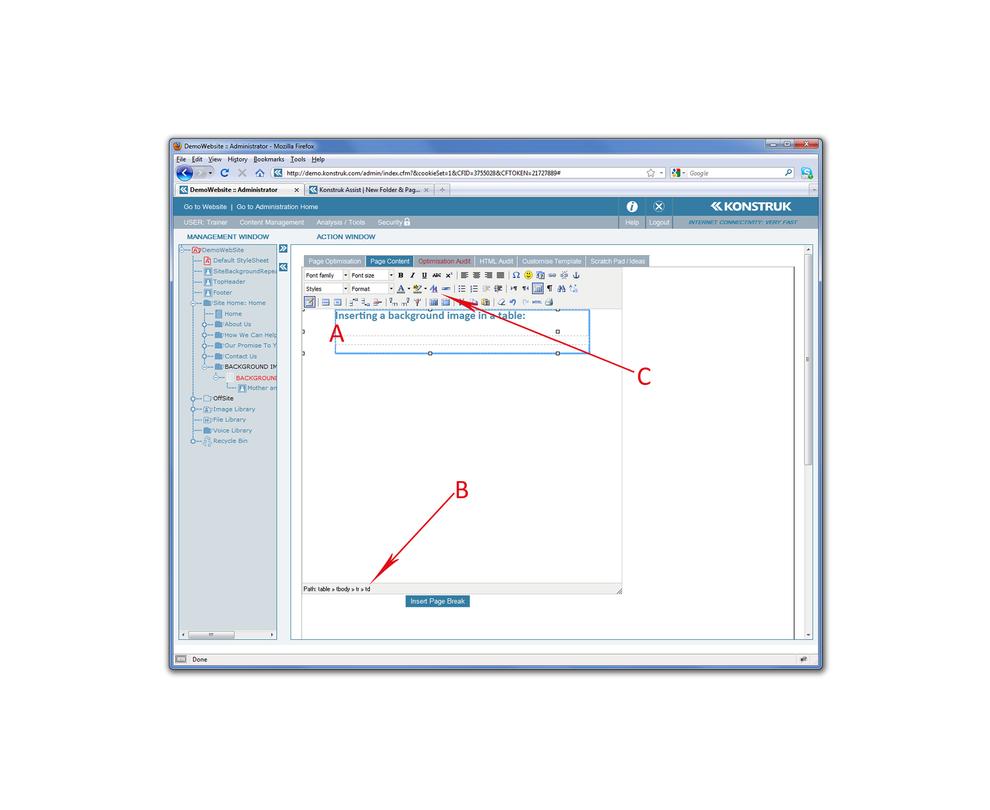
Insert a base table 70% wide, center aligned, ‘0’ padding, ‘0’ margin.
- Place your cursor inside the cell you wish to have the background image to show in.
- Select the td
- Select the Edit CSS Style button
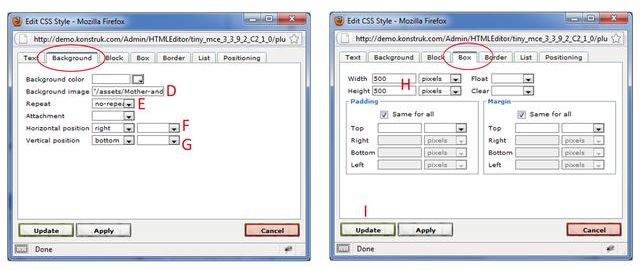
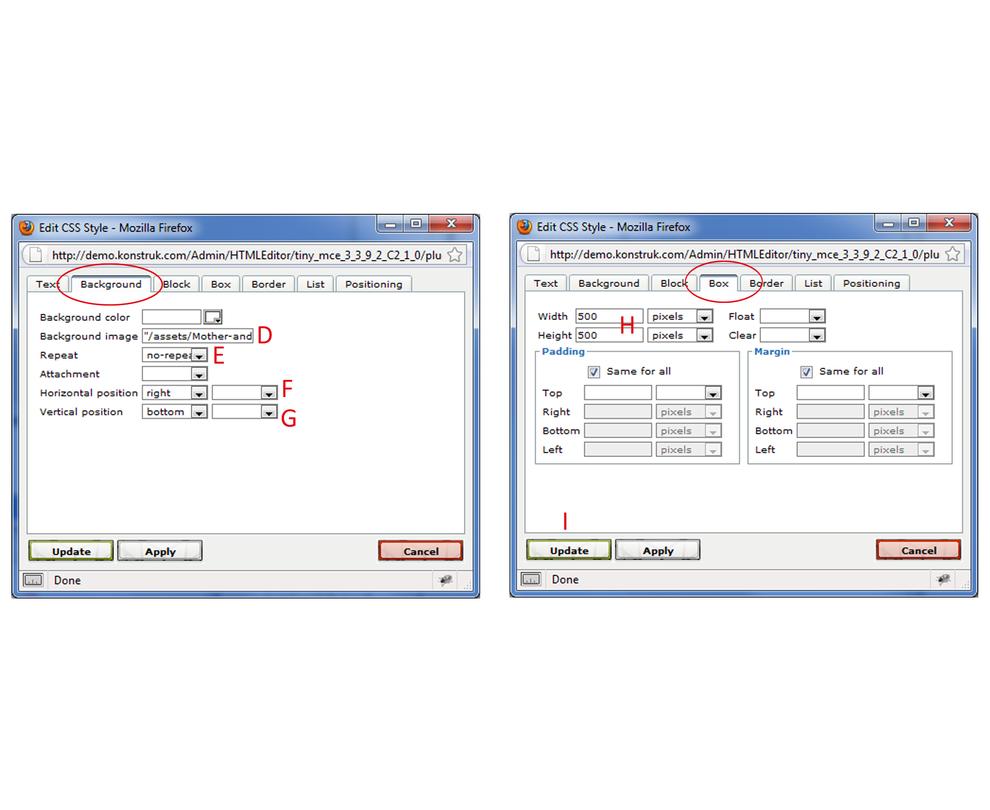
In the Edit CSS Style pop up box go to the “Background Tab”
- Paste the name of the image that you had previously saved from “Show File”
- Repeat - select no-repeat from the drop down box. This means that no matter how large your table data cell gets the image will no repeat.
- NB/ in some instances you may wish this to repeat.
- Horizontal Position - right
- Vertical Position - bottom
Go to the “Box Tab” to define the width and height of your cell so that the image is displayed fully. If this is not chosen then you will only see the image when you have text in the table.
- Width and Height of 500 pixels as we know that our image is 476 x 365 pixels.
- Say Update
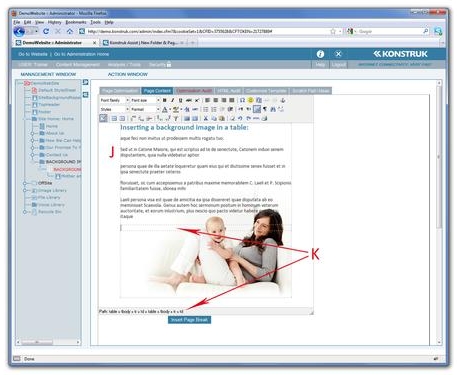
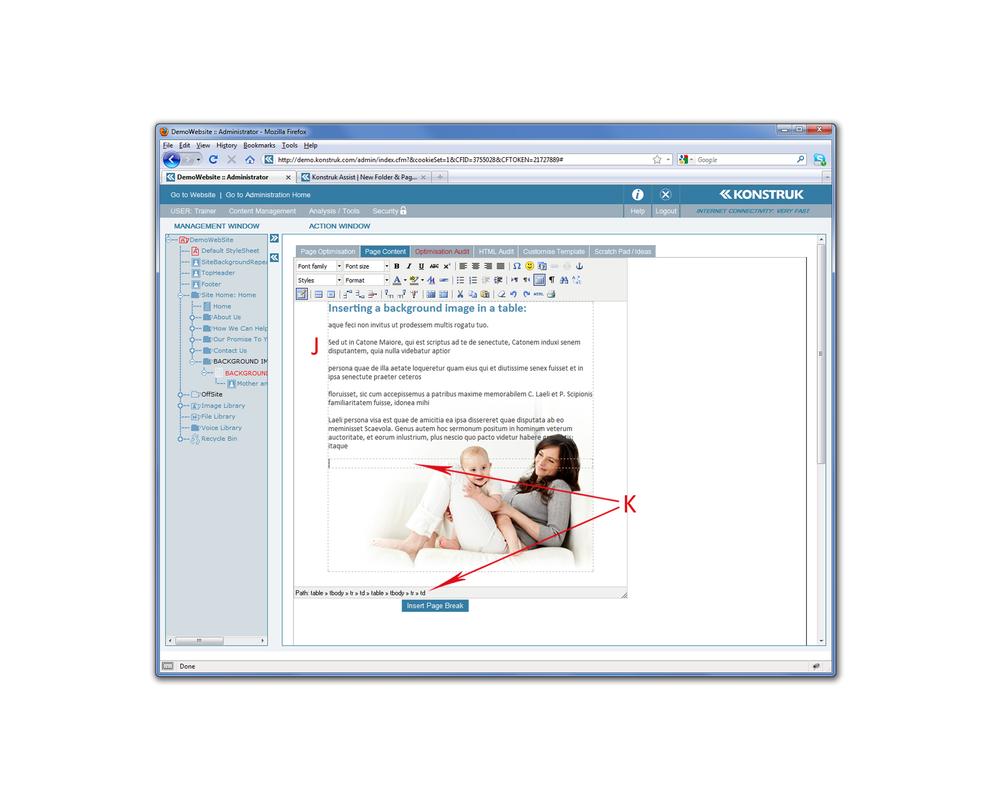
When you get back into your Page Content of the editor you will see the background image.
In this instance we wish to have a padding around the words of the background image, so we placed a secondary table inside the base table so that the padding does not effect the background image.
- You can start typing in your words into the secondary table.
- Select the td of the secondary table and Edit CSS Style, place a padding of what you desire - in this instance we needed a right padding of 200 pixels and type in the desired wording.
View in draft form on your website and play with padding or hard enter lines as required.