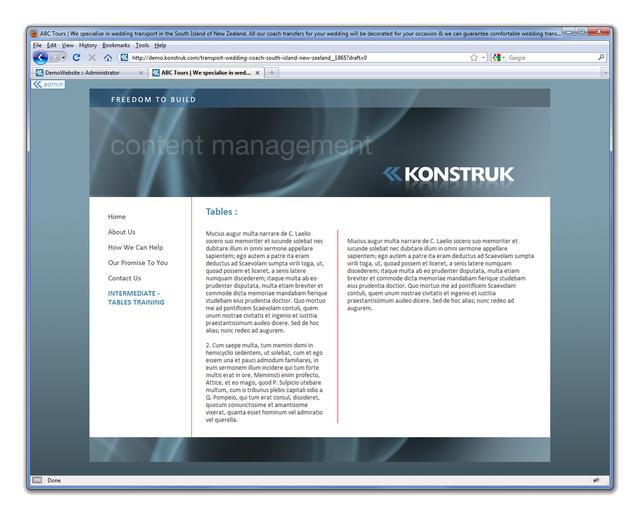
Advanced Table Manipulation |  |
In this example we have a two column table with only words in it. We want the left hand column be slightly smaller, need padding on the right and a border. The right hand column will need padding on the left to move it away from the border.
Smaller column / right padding / border
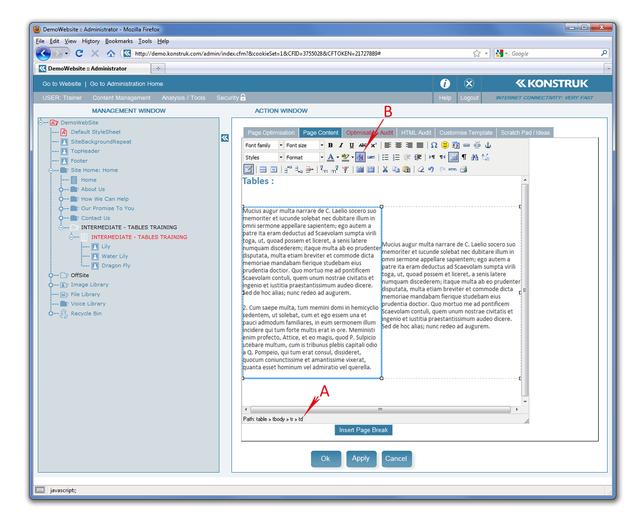
- Place cursor in the left hand column and select the td to ensure entire table cell data
- From the tool bar, select the “Edit CSS Style” button
The pop up box that occurs is where you can do a multitude of things to individual words, images, and tables, the best way to learn in here is by trial and error.
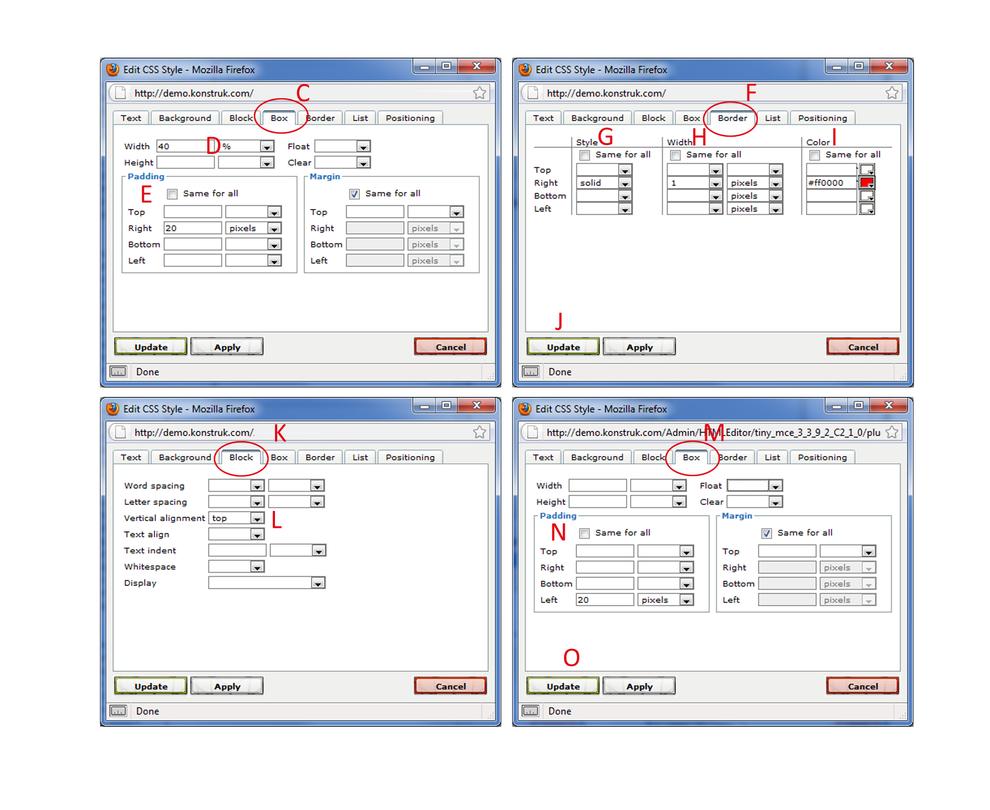
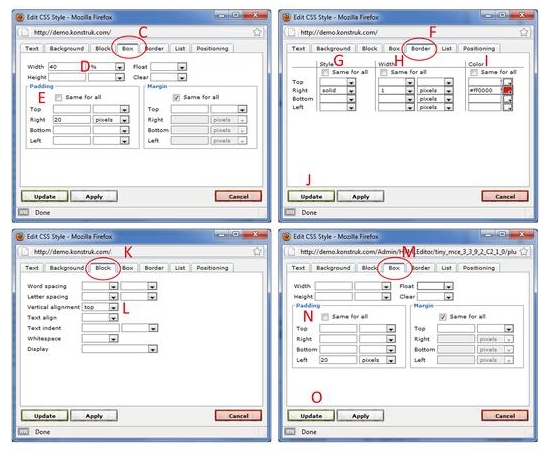
- Thinking about the left hand column of your table only, go to the “Box” tab
- Change the width of that column to be 40% (or your chosen percentage)
- NB/ we are referring to a percentage of your table, even if your table is 50% wide, the columns will still add up to 100% of the table.
- NB/ only ever use percentage as it is the safest way to ensure consistency will different sized monitors.
- Untick the same for all box under padding and place the pixel gap you wish in the “Right” row
- Go to the “Border” tab
We are going to create a border on the right of this table cell data only as we wish a line between the two columns.
- Untick the “Same for all” box for Style, drop down the box on the “Right” row and select solid
- Untick the “Same for all” box for Width, drop down the box on the “Right” row and select value, type in the pixel width that you want
- Untick the “Same for all” box for Color, either type in the RGB FF number (#) or select a color by clicking on the pallet box.
- Tick Update and see your right hand column change in the Page Content Editor
Select the td for the right hand column and go back into Edit CSS Style. Noticing that the right hand column does not have as much text in it and we wish to have all text top align we can do this via the CSS Style pop up box as well.
- Go to the “Block” tab
- Change the vertical alignment to be “Top” via the drop down options
- Go to the “Box” tab
- Untick the same for all box under padding and place the pixel gap you wish in the “Left” row Tick Update and check changes.
- NB/ Always leave one cell blank to allow the computer to calculate the width of the cell. In this instance we only need to tell the left hand cell to be 40% and the computer will know that the only other cell is 60%.