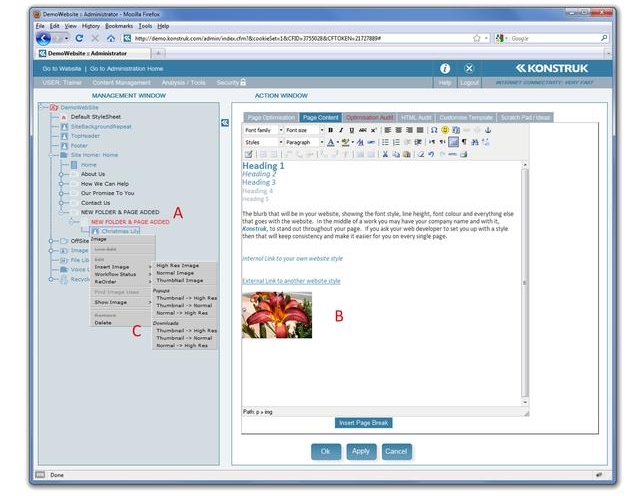
Adding an Image - Insert |  |
Catch phrase to remember and recite ...
We recommend that the image is uploaded to the page it will be visible on. There are some exceptions, i.e. Galleries, but for the purpose of this manual we are going to deal with Single Image Uploads.
- Select the page that you are inserting your image onto and Edit the Page Content Tab
- Place your cursor inside the content window
- Right click on the image node > Insert Image > select your option:
- The first three options are used when you do not wish a pop up to a larger or different image to occur for the client.
- Popups - depending on the option it will insert the first written and then pop up into the second written.
- Downloads - used mainly by media or photographers - e.g. Insert Thumbnail - > High Res will show the thumbnail image on the website and when selected the end user is asked where on their computer they wish to save the High Res file.
- TIP/ An image can be right aligned / center aligned / left aligned the same as text and this will allow for text to wrap around your image. Simply select the image and use the buttons in the editor tool bar.
- WARNING/ Please do not use the “Insert/edit image” option when right clicking within your Page Content Editor, this is not safe for resizing or changing the image in all browsers.


